Monday, February 14, 2022

Valentine's Day!

Happy Valentine's Day 2022!

To a special person on Valentine's Day 2022. Much love. 

My craft room revamp is almost done, and it's close enough that I could start making cards again. For such a basic card this took longer than I expected to make. I'm out of the groove of card-making I guess. Time for me to jump back in.

I'm not entering this card into any challenges.

Materials
Hero Arts Loving Messages Clear Stamps
MSE! (My Sentiments Exactly) M122 Back of Card Set
Penny Black heart hedgies Clear Stamps
Simon Says Stamp! SSS2-2111 Be My Valentine

Derwent Burnisher & Blender
Prismacolor Colored Pencils in:
  • 902 ultramarine
  • 906 copenhagen blue
  • 914 cream
  • 924 crimson red
  • 926 carmine red
  • 928 blush pink
  • 929 pink
  • 930 magenta
  • 932 violet 
  • 940 sand
  • 946 dark brown
  • 947 dark umber
  • 956 lilac 
  • 995 mulberry
  • 1006 parrot green
  • 1008 parma violet
Lawn Fawn Clear Ink Pad
Hero Arts Stamp Pads in Bubble Gum and Strawberry
Ranger Distress Ink in Antique Linen
Ranger Wendy Vecchi Embossing Powder in Red Geranium 
Martha Stewart Crafts Valentine's Foam Icon Stickers
Sticko Purple N Pink Hearts Stickers
Crafter's Companion Pop Dots

Other Materials
card: A7 size, white; white paper suitable for colored pencils; scissors; heat-resistant craft mat; paper trimmer; embossing heat tool; double sided adhesive tape; and acrylic stamping tool

Instructions
Stamp the inside with clear ink and the "Happy Valentine's Day" saying from the SSS set. Add Red Geranium embossing powder, tap off excess, and heat with heat tool until melted. Stamp the back with the "made just for you" from the MSE! stamp set in Strawberry Ink. On a separate sheet of paper stamp "for someone SWEET" from the heart hedgies set in Bubble Gum Ink, and stamp the flower hedgehog in Antique Linen Ink.

Color in the flowers and hedgehog using colored pencils. Use the paper trimmer to cut the sentiment and scissors to fussy-cut the hedgehog. Adhere the sentiment with pop dots. Add a little double sided adhesive to the top of the hedgehog and pop dots to the rest of the body. Position just over the edge of the sentiment before adhering. Add some heart sticks and an I <3 U. Don't forget to sign your card before giving it to that special someone! (Don't worry, I signed it after taking pictures.)
 
The finished card!

The inside of the card.
The back.

Tuesday, March 26, 2019

Racing birthday dog!

Racing dog headed to the party!
I was looking to make a birthday card and these newly acquired stamps from Fiskars caught my eye. I'm not sure what happened to the color in the photo but it looks better in person; it's a little off in the photo. Also impossible to see is the glitter added to the party hat and present, but it shows up somewhat on the banner.

I'm entering this card into one challenge:
Simon Says Stamp Work It Wednesday Challenge: Cute.

Materials
Fiskars Lia Griffith Party Time Clear Stamps
Lawn Fawn Beam Me Up Stamps
Lawn Fawn Stitched Hillside Backdrop: Portrait Die

Various Ranger Distress Oxide Inks and Spectrum Noir markers (Sorry, I forgot to keep track of specific colors!)

Ranger Mini Ink Blending Tools
Spectrum Noir Clear Sparkle Glitter Pen (has a brush tip)
Designer Dries Clear Adhesive: 159723
Metal Tip for Adhesive Bottles: 352854

Other Materials
card: A2 size, blue gradient; alcohol marker paper in white; black dye ink pad; die cutting machine such as the Big Shot; Brother Scan N Cut2 or scissors; craft mat; and stamping tool such as the MISTI

Instructions
Use the Hillside Backdrop on white paper and run it through your die cutting machine. Ink up the main part of the backdrop with Distress Oxides in blue and green. Use various other colors for the tiny house and pine trees.

Stamp your car image onto the alcohol marker white paper. Mask off the car and stamp the doggie onto it. Remove the mask and stamp the tiny birthday hat and present from Beam Me Up. Stamp out the banner and the sentiment on the same paper. Run both through your Brother machine or fussy cut with scissors. Color with markers, add glitter, and glue everything down. Done!


Wednesday, November 14, 2018

Thankful for Friend

Yes, the text on the card is not even on purpose.
This card was made especially for a nature-loving friend of mine. I was a little sad the blueprints didn't show up very well, but if anyone can tell what the leaves are without needing to look them up, it's her. I am very thankful and grateful to have her in my life as a friend.

I'm entering this card into four challenges:
Simon Says Stamp Work It Wednesday Challenge October 2018: Give Thanks!
Simon Says Stamp Monday Challenge: Thanks/Thanksgiving
Simon Says Stamp Wednesday Challenge: Thanks/Thanksgiving
and Frilly and Funky Challenge: A Harvest of Gratitude.

Materials
Lawn Fawn Hello Friend Stamps
Lawn Fawn Jump for Joy Stamps
Tim Holtz - Stampers Anonymous Mini Autumn Blueprint Cling Stamps
Tim Holtz - Stampers Anonymous Great Outdoors CMS321
Prima Marketing, Inc. Cling Stamp #582678 wood grain design*(see warning below)

ZIG Clean Color Real Brush Watercolor Markers
• for Oak: 050 yellow, 070 orange, 052 bright yellow, 060 brown, and 029 geranium red
• for Birch: 053 yellow green, 051 lemon yellow, and 050 yellow
• for Maple: 060 brown, 022 carmine red, and 020 red
Ranger Distress Oxide Inks in: Antique Linen, Gathered Twigs, and Walnut Stain
Ranger Distress Ink in: Antique Linen
Colorbox Pigment Ink in Rose Gold
Wendy Vecchi Embossing Powder in Potting Soil
The Old World Mat Stack paper

Ranger Mini Ink Blending Tools
Tonic Studios - Tim Holtz Paper Distresser
Recollections Paper Flowers
Designer Dries Clear Adhesive: 159723
Metal Tip for Adhesive Bottles: 352854

*I would advise against trying to use this particular stamp. It has never produced a good impression when used with any type of stamping tool or stamp block, despite multiple attempts and much finagling. The only way I got this stamped was to take it off the stamping tool and mash down the center by hand.

Other Materials
card: A7 size, kraft; brown paper; watercolor paper; scissors; paper trimmer; craft mat; heat gun; stamping tool such as the MISTI; Scotch Advanced Tape Glider; and pop dots

Instructions
Starting with your kraft card, ink the edges with Gathered Twigs, lightening as you move inwards. Take a sheet of green-ish paper from The Old World Mat Stack and use the paper distresser on all four edges. Because of the way this paper tears, you may need to use it on both sides of the edge to get the desired effect. Go over the distressed edges with a blending tool and the Distress Oxide in Antique Linen.

On the brown sheet of paper, stamp the wood grain design in Rose Gold and cover with Potting Soil Embossing Powder. Shake off excess powder and melt the remaining powder with your heat gun. Trim to the edge of the stamp impression on the paper. Gently tear off two opposite edges to achieve the ragged effect in the final photo. On the remaining brown paper, stamp the tree cross-section in Walnut Stain and fussy cut out around the outer edge. (You can tell how much my friend means to me; I despise fussy cutting and usually avoid it as all costs, but tree cross-section!)

On the watercolor paper, use the Distress Ink in Antique Linen to stamp out the three leaves. Listed above are the colors for each leaf, in the approximate order that I used them. When the leaves are colored to your satisfaction, cut out each leaf blueprint and ink the edges with Distress Oxide Antique Linen.

Using either the ATG or glue, affix the green paper to the front of your card in the center, followed by the brown wood grain. Before adding other dimensional elements, figure the position your sentiment needs to be stamped in and use Distress Oxide Walnut Stain to do so. Inside the card stamp your preferred greeting also in Walnut Stain; I chose a stamp from the "Hello Friends" Lawn Fawn set (note that it is a retired stamp set). I was glad I used my stamping tool for that because it did take two tries to get the saturation I was looking for in the ink.

Use pop dots to affix the tree cross-section to the bottom right front of the card. Glue the leaves onto it next, and finish with gluing on the paper flowers. Give to someone who means a lot to you.

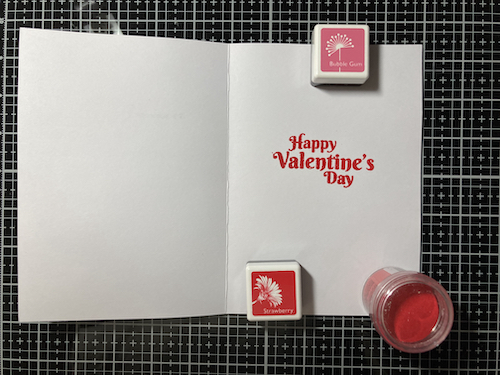
I kept the inside of the card simple.

Tuesday, October 30, 2018

A Wintery Thanks

When your paper sparkles more than the gemstones!
This is what happens when you can't sleep and get up to craft for a while instead.

I'm entering this card into three challenges:
Simon Says Stamp Blog's Work It Wednesday Challenge October 2018: Give Thanks!
Lawn Fawnatics Challenge 39 Bling It Out!
and My Favorite Things Wednesday Sketch Challenge - Sketch 408.

Materials
Lawn Fawn Scripty Thanks Die Lawn Fawn Stitched Snowflakes Die
Spellbinders Nestabilities Dies Standard Circle, SM: 3"
Style Steal Gemstones (from Michaels)
DCWV Inc. Glitzy Stack
Designer Dries Clear Adhesive: 159723
Metal Tip for Adhesive Bottles: 352854

Other Materials
card: A7 size, dark blue; paper trimmer; and a Big Shot or similar tool

Instructions
Use gold glitzy sparkle paper with the 3" circle die. From the silver glitzy sparkle paper cut two stripes the width of your card 5" long each, at a height that looks good to you. Use the remainder of the silver glitzy sparkle paper with the "thanks" and snowflake dies. When all of these are glued onto your card, add some clear gemstones for a final sparkly touch.

The template for this card from My Favorite Things Card Challenge Sketch 408.

Monday, October 1, 2018

"for you" Fall

Happy Fall!
I'm happy with how this card turned out! It looks so fall-like to me, and it required zero stamping. It's nice to take a break from using stamps now and then.

I'm entering this card into three challenges:
Simon Says Stamp Blog's Wednesday Challenge: Anything Goes
Lawn Fawnatics Challenge 38 Awesome Autumn
and Papercraft Business Challenge 11: October 2018; optional Halloween/Fall/Autumn.

Materials
Lawn Fawn Leafy Tree Backdrop: Portrait Die
Lawn Fawn Scripty For You Die
Lawn Fawn Stitched Hillside Borders Die
Lawn Fawn Stitched Windy Backdrop Die
Lawn Fawn Stitched Woodgrain Backdrop Die
Ranger Distress Oxide Inks in: Broken China, Candied Apple, Faded Jeans, Fossilized Amber, and Spiced Marmalade
Ranger Mini Ink Blending Tools
Designer Dries Clear Adhesive: 159723
Metal Tip for Adhesive Bottles: 352854

Other Materials
card: A2 size; white paper; brown paper; green patterned paper; paper cutter; water mister; and a Big Shot or similar tool

Instructions
Your first step is to run the sheet of brown paper through your die cutter with the Woodgrain Backdrop, and take the resulting sheet and send it through again with the Leafy Tree. Do the same for a white piece of paper and the Windy Backdrop, and a green patterned paper and the Hillside Borders.

Take the Broken China and Faded Jeans Distress Oxides and apply them to your white paper with the windy backdrop. Add and blend until you're happy with the results. Mist with water and gently dab to lighten the oxides.

Use the Fossilized Amber, Spiced Marmalade, and Candied Apple on a blank sheet of white paper, blending and mixing until you like the results. Run "for you", the leaf portion of the tree, and one set of leaves through your die cutting machine with this mixture of colors. If you're using the tree die cut flipped and with the tree on the right side of the paper as I did, remember to reverse the die on the sheet of autumn colors for your leaf portion of the tree, so the color ends up on the correct side when you go to glue it.

Use your paper cutter to trim the sky and ground to the dimensions of the card. The gluing order should be sky, ground and leaf part of tree, tree/border, and last sentiment and random leaves.